Tuesday, December 29, 2015

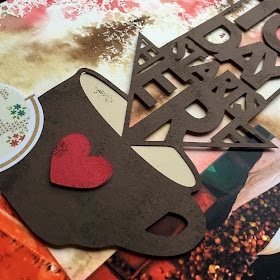
Today Starts Here

My husband and I were able to go away for the first half of December to Costa Rica! It sure was nice to escape the cold and stormy Pacific Northwest. One of the places we visited was in the Los Santos region. It is called Los Santos because most of the towns are named for saint. We stayed near Santa Maria. Our first day we visited a coffee co-op processing plant that processes for all the local farmers. The area is full of valleys and mountains. You can go from 11,000 down to sea level in no time at all and all through the valley are coffee plantations. We learned all about the growing and processing of coffee there and it's an amazingly lengthy ordeal.

When I saw Cuppa Joe, by The Cut Shoppe, I knew I would have to use those cuts for this portion of the trip. As a bonus, it's sort of Christmas colors with the red cherries. That is the first thing I learned, coffee starts as a cherry. The coffee bean we know and use is one half of the seed inside this cherry and it goes through an awful lot to get to your cup.


I started off by inking my craft mat with a red and two brown distress inks. I spritzed with water and pressed my watercolor paper into the ink. I love the watery/splattered look it left. Next I cut out a mat from the Retro Rectangles, which look like coffee beans to me. Next, I cut out 3 of the files from Cuppa Joe, from an espresso color, and inked up a bit to give some texture. A touch of red for the hearts and creamy coffee color makes them pop. I added my photos of the cherries on the tree and being brought in for processing, arranged my cuts and added a few embellishments from We Are Family and Hey Boy. Next came writing my stories onto journaling strips and scattering about the piece.

"Before your coffee ever hits your cup, it starts off as a cherry in a place like Costa Rica. We visited Coopedota in Santa Maria, CR and learned all about the process to get to your cup. First the cherries are picked and brought here where they are sorted, separated, dried, hulled, dried again, given rest, and either sold green or roasted and bagged in beans or grounds."

"Fun facts:
There are many layers to a cherry
The skin can't be eaten, but the insides are juicy and taste like honey
There are two bean halves (1 seed) per cherry
They use the hull (parchment) to fuel the furnaces
The plants require shade so other crop trees, like banana and avocado, are planted within. The limbs are trimmed to regulate shade"


I hope you learned something and think of all the work that goes into your next cup of coffee. I loved both of the cut file! Head over to the store and see how you can use them today.


Tuesday, December 15, 2015

Hi Hey Hello There

Recently my daughter, her husband, and their cat moved in whilst their house is being built. On move in day, my daughter placed the cat carrier on my lap and left to bring in all their stuff, leaving the cat closed in so she wouldn't run out the door. This is the view I got, a cute lil nose, peeking out one of the air holes. It was so cute! I remembered this awesome title Ashley made The Hello There and thought it would be perfect. I decided to print my photo large and let it take up most of the space on the page, layering the title in the white space of the photo. It really didn't need much more, so I grabbed Pop Caps to add to the top of the photo. I few wood pieces, paw stickers, and a bit of string were all that were needed.


Head over to The Cut Shoppe and find something fun to use on your next project!


Monday, November 16, 2015

Secret Garden

Recently a friend from church invited my daughter in law and I over to see her dahlia garden. She brings oodles of flowers, to all events, all summer long and DIL and I told her one day we wanted to see where they all come from. There are always so many varieties; she told us that she has 217 plants, all filled with blooms. She even has this mirror hanging on her fence and wished that she had a photo of her garden reflected in it, so I complied.

I thought the delicate eyelet of the Endearing Eyelet file would be the perfect background for the flowers and that pretty little mirror. I cut it from white card stock, did some watercolor wash and ink splatters, then placed it over an ombre wood grain paper, using foam tape to give dimension. I used the Retro Rounded Corners and Funky Florals to create the big flowers I placed a bright piece of multi color paper for the matte, my photos on top, added little pearls in the eyelet centers, bling in the flowers and my journaling. Pretty simple layout that didn't take long at all, but makes an impact.


Head over to the shop and pick up some fun new files today!


Tuesday, November 10, 2015

Blood Moon

I really liked these colors at CSI this week. Not sure what made me think of the blood moon photos, maybe the circle photos in the sketch, but for whatever reason, I decided to use these photos. They almost didn't happen. It was a very spur of the moment "Let's go!" that had me grabbing my gear and racing out the door. I am so glad I did too! We drove out a ways to the backside of some hills around here. We got up to the top and didn't see anything. We stopped and asked some folks if they had seen the moon and they pointed out a faint light in the midst of mist. We decided to go find a nice dark spot, with a good view, and by the time we got there, the mist had cleared out and this beautiful moon shone down on us.

I decided some red ink drips would be the place to start. I was going to use them in place of the banners, but without the banner, the photos looked like giant spooky googly eyes, so I added some in, using scientific sort of paper. But first I stamped on the piece of kraft paper with a variety of texture, science, and travel stamps. I really like how da Vinci it turned out. I painted some stars in the teal color, added some stitching, wood, and metal gears to finish off that old time scientific sketch look.

Evidence used: kraft background, transportation, clouds, metal, gears, stamps, and thread.

Testimony is documenting an outing. "News of the rare super blood moon was in the back of my mind, but I hadn't given much thought to it. We were hanging out when we thought, 'Let's go shoot it!', so we packed up our gear and raced to a good spot. So glad we did because it was spectacular to shoot!"


Tuesday, November 3, 2015

Pelican

 Today I am featuring the Fancy Feathers file. I love these feathers! I searched through my photos looking for birds just so I could use this awesome cut.

My dad and I went to a wildlife area about 2 miles from my house to see what kinds of birds we could photograph. Neither of us had been there before and we were graced with a variety of awesome birds. From heron to hawk to geese, to cute lil birds, and finally these awesome pelicans. They were really cool to watch. I thought the feathers would do them justice.

I simply cut out a variety on plain white cardstock, the kind you find in the office supply and went to work on them with distress ink. I smooshed ink on my splat mat, spritzed with water, and plopped the feather into the inky mess, repeat. All very technical. After they were all dry, I tied them up with twine and placed them on my layout.

The matte papers are from my Gelli print collection and I cut the clouds out and watercolored them, inserting them in between the layers of papers and photo.


Head on over to the shop and see how you can use these awesome feathers for yourself!


Sunday, November 1, 2015

Hello Fall

The Cut Shoppe teamed up with Page Maps for the November sketch reveal!

I loved the sketch that Becky sent me. I love working with multiple photos and I really liked the background too. I took some Fall colors photos with my dad a few weeks ago and I thought leaves fit the sketch well. I only did 2 clusters, instead of the 3 in the sketch because mine are pretty big. I did some thread and hearts for the 3rd cluster.

I used a variety of cuts from the shop, including the "hello" from Word to the Wise and Tall Type for the title, and Free Falling and Funky Florals for the leaves.

I seriously love that "hello"! The cut strips are so fun and add so much texture. You could cut the word without the slits to be a different colored background, but I liked the look straight on the orange. I think it looks striking. You could also remove the stripes and have some pretty cute, fat letters. The Tall Type "fall" was the perfect compliment to the fun "hello". My leaves were cut out from two different files, one being a Spring flower themed file, and inked with distress ink and then spritzed with some water to add texture. A few ink splatters, the hearts, thread and journaling were all that were needed to finish off the layout.


Be sure to check out the Page Maps site for a sketch that you can use for your Fall fun.


Wednesday, October 28, 2015

Who Girl


Welcome to The Cut Shoppe's Halloween blog hop! You should have arrived here from Madeline's blog. If you just happened here, you can begin at The Cut Shoppe's blog. Be sure to hop to all the blogs because we will each be giving away a different cut file, in addition to the grand prize of $25 to The Cut Shoppe store! Comments will remain open until November 2nd with the winners being announced on The Cut Shoppe's blog on November 6th.

I haven't really done much for Halloween for several years. My kids were just too old, then out of the house. Last year our daughter-in-law and her sister wanted to have a costume party and we were invited so I needed to come up with a costume. I love Doctor Who! Bowties and fezzes were quite popular, so it was only a matter of finding a blazer and a shirt. Our local second hand store provided quite nicely for that. My husband snapped this photo of me to send to my fellow Whovians before we left for the party. Turns out the party was really just a way of gathering the family together so my daughter-in-law's sister could announce her pregnancy...with twins! It was a really special night.


I used Geeked Out, of course. This was one of my first files from the shop and I love it. I decided to use a couple of cuts from Let Them Eat Pie to be explosion bursts, which featured into the story line of the 6th season of the show. I started off with a base of Trippy Triangles cut from black cardstock and placed over a piece of deli paper that I made a Gelli plate print on. I wanted brights set on a black background. I love how it turned out!

I will be giving away this super fun background, so be sure to leave a comment.


Next stop on the hop is Aimee!

Here is the order if you get lost

Laura Mooney <<<You are here

Tuesday, October 27, 2015

The Great Apple Harvest

As soon as I saw the the Very Squarey file I knew I had to make a stencil from it! I love the mix of squares and that they aren't perfectly laid out, but a bit wonky. I'm all about the wonky. I think it's interesting.

To start off, I placed my newly cut stencil on a piece of watercolor paper and applied heavy gel medium over the entire area. Let dry (I place mine in my oven on warm, but you could let air dry.) then mist with spray inks (I used one color at a time). Once the color is on the page, mist with a spray bottle filled with water. The gel acts as a resist and the ink will wash off or wash lighter, leaving the pattern to pop out of the color. I then took some markers, of the same colors, and traced around some of the boxes. A little splattering of the darker ink finished off the background.

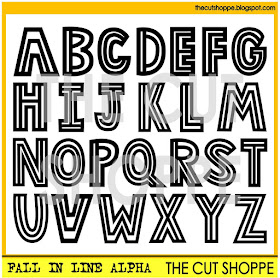
Since the background is so bright and attention grabbing, I didn't need to add much else. I used the Fall In Line Alpha at the main part of my title, adding small letter stickers for the supporting bit of the title. I only needed a few additional embellishments, some enamel dots and a couple of things from the We Are Family from Simple Stories. I loved the letters from the Fall In Line Alpha! I decided to ink with the same colors as I used on my background, only in reverse order, then added black outlines to help them stand out.


https://www.etsy.com/listing/250182054/the-very-squarey-background-cut-file-is?ref=shop_home_active_11


These two files really helped me tell a fun little story in super fun way. Pick them up in the shop 
 today! 


Saturday, October 24, 2015

Artist's Life

At first I had no idea what I was going to do with this week's CSI case. Not typically the colors I would turn to, but then I saw in the evidence prompts to use tea cups. This reminded me of visiting my friend Renae, having tea and scones, and making art.

I started off by laying down a doily stencil and applying heavy gel medium through. After letting dry completely, I spayed with yellow spray ink, then spritzed with water to "wash" off the gelled doilies. The gel acts as a resist. Last time I was over, Renae gave me some books of music to use in art journaling. One of the pieces was this one, titled Artist's Life. Could anything have been more perfect? This became the base of my layering. Of course a day of tea drink and art making needs doilies and lace, so I grabbed several of these, including those eye catching red ones! I love the red doilies. I cut a doily banner out on my Silhouette, as well as the tea cup. Of course both needed the addition of pearls. Some ink splatters, a few metal bits, and my journaling finished off the piece. I just let the title of the sheet music be my title for my page.

Evidence used: banner, book pages, metal, doilies, tea cup, wet medium.

Testimony is a line from Carry on Tuesday, followed by my thoughts and reads, "A song is but a little thing and yet what a joy it is to sing. I love our crafty teas together. They make my heart sing."


Tuesday, October 13, 2015

Falling Leaves

Sharing a layout with files from the The Cut Shoppe with you today. Fall is my favourite season of the year! I love the cool, crisp days. Love the return of rain, bringing refreshment to the dry land Summer has left. Love getting cozy with a good book. Most of all, I love the colored leaves. As soon as I saw Leaf It To Me, I knew it would be the perfect cut for some of my Fall foliage photos. Looks Like Autumn, which was a free cut file offered by Scrapbook Nerd, had the perfect additions to add to the piece.


After creating a cool, inky background, I cut the leaves and triangles out of white cardstock, then I took my spray inks and distress inks and colored them. The spatters on some of the leaves was and accident, but I loved the texture it added so I added spatters to other leaves as well. The way the leaves cut makes them perfect for adhering in a non flat way, adding a ton of dimension to the page. They really do look like real leaves. 


I'm sure there is something in the shop that will help you tell your Fall stories!


Monday, October 12, 2015

Air Mail

I LOVED the color palette at CSI this week! Thinking of mail made me think of some cool mail I've had recently. I have been collecting some vintage parts lately, namely watch faces and old skeleton keys. I found both through Etsy in Eastern Europe. I got a batch of watch faces from Ukraine and keys from Romania. Both packages came loaded with cool stamps! Exciting mail for sure.

I started off by wetting a piece of watercolor paper, then added spray ink. This ink sort of separated, giving slightly different hues and I think it looks cool. I used some postmark stamps on the background, from all over the world. Next I cut out a world map from a Silhouette cut file, out of white cardstock. I covered the pieces with two colors of distress ink, then spritzed to give the mottled look. I got this great stamp/die set, from Stampin' Up, for my birthday; feathers. I love them! I inked the stamp with distress ink, gave a quick spritz of water, then stamped. I gives this sort of watery look that is just awesome. I wanted a bird flying with mail, so I cut the teeniest envelope out with my Silhouette. It is so cute! I cut a larger one out to hold my journaling too. I found the perfect washi too. Right colors AND airplanes.

Evidence used: envelopes, string, animals, stamps, feathers, and washi

Testimony is in the envelope. "I've been collecting some vintage metal parts from around the world. So fun getting mail with cool stamps."