Thanks to everyone who spent the week with me learning some new techniques (or being reminded of some that were on the shelf) I have 2 winners who win a grab bag of awesome Unity stamps.
Wynn Grob
Beckijo
Congratulations, ladies! Be sure to email Kelli Haglund at kelli@unitystampco.com so they can get your prize to you.
Thanks for the fun week!

Monday, February 20, 2017
Friday, February 17, 2017
Growing In Unity Day 5
And so we come to my last day posting as a GIU gal. I have another background for you today.


Gather all supplies. I decided to use summery colors and the fun Hello Summer Itty Bitty. You'll also need a water sprayer and some salt.

Spray colors throughout the card base.

I like layering a few colors, making sure not to let them muddy up.

Holding my base down, I added some water to make a nice watery pool. Keeping the center from pooching up keeps the colors from running tougher and off the paper.

Sprinkle with salt. The salt begins to soak up the extra fluid, so don't worry about having too much liquid when you add the water. Different kinds of salt give different looks. The chunkier the salt, the larger the spaces left in the ink. This needs to be air dried, no short cuts, to get the best look.

Once dried, brush away the salt, scrubbing a little with a paper towel, if needed.

Doesn't it give a great textured look? This technique also works well with watercolors.
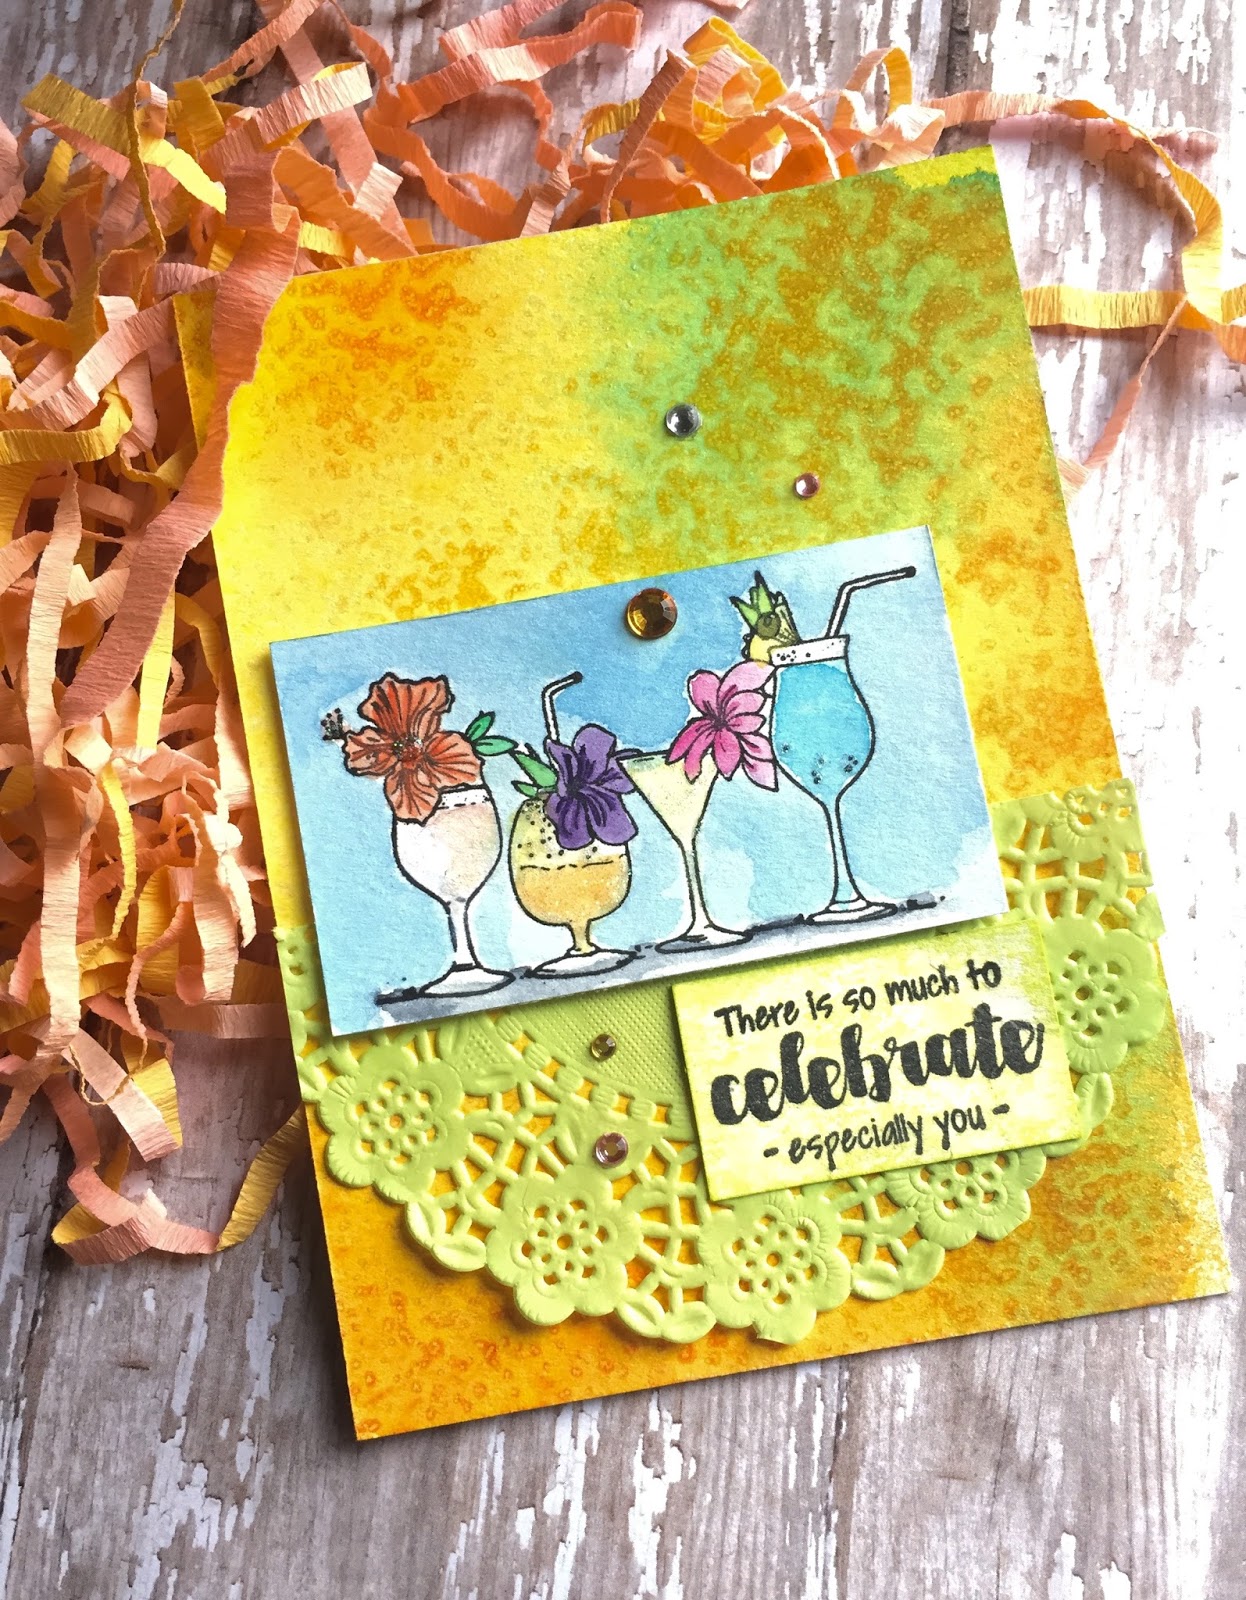
I added my painted stamped image, a colored doily, my sentiment, and some jewels. Doesn't it just make you want to sit by the pool with a frosty drink?
Thanks for sharing in my week of tutorials, I hope you find them useful and can't wait to see how you use them. Don't forget to comment for your chance at one of the 2 grab bags of awesome Unity. See you next time!
Thursday, February 16, 2017
Growing In Unity Day 4
It's almost the weekend and my Friday! Today I am going to focus on a technique from my early mixed media days, but it's a good one. I'm using heavy gel as a resist against spray inks. It creates really cool backgrounds.


Gather supplies. I chose Sending Up Something Beautiful for my stamp set, so I used a cloud stencil. The process works great with texture stencils as well. Be sure to use heavy gel as you need the stiffness to hold the shapes of the stencil.

Hold down your stencil, I use my magnetic mat and magnets, but you could also use painter's tape, you just don't want it moving around.

Apply a nice thick layer of the gel over the entirety of the stencil or the sections you wish to fill in.

Smooth out as much as possible. Remove stencil, set aside to air dry. If you're really impatient, you can place it in a warm oven to speed the process up, but I just set it aside and work on the rest of of my bits to add on top. Be sure to wash your stencil right away as the dried gel can damage it.

Whilst my gel is drying, I prepare the rest of the parts for the card. I stamped images on scrap pieces of watercolor paper, painted, cut them out.

Once the gel is dry, spray the paper with desired spray inks. No need to cover completely because you'll add water to spread out the ink and wash the gel clear.

Dry with heat tool to keep colors from mixing and muddying the colors. You can see the gel clouds wicking away the ink.

It really makes a cool effect. I've not used it with the cloud stencil, but will soon again!

I added the rest of my elements, doily, hot air balloon, clouds, sentiment and have a finished card!
Be sure to comment each day to have a chance to win one of two grab bags of Unity stamps; see you tomorrow for my last day!
Wednesday, February 15, 2017
Growing In Unity Day 3
Happy Wednesday, it's day 3 of my week of GIU. Today I am focusing on some of my favorite grunge techniques. I love getting messy and making some super grungy, old looking art.


Gather supplies. I used a variety of brown distress inks, some foil, a metal patterned embossing folder, rusting paste and corrosion colored patina, as well as my handy dandy spray bottle.

Start off by covering your watercolor base with a layer of ink.

Spritz with water, trying to get drops of all sizes. The big ones leave cool texture.

Dry with heat tool. I dry between each step to minimize the colors turing into mud.

Chose a color and stamp it onto a silicone mat or waxy side of freezer paper. Stamp it all over.

Spritz with water. Not too much, or you lose those small bits of ink

Press water color paper into ink.

Heat set again.

Keep adding ink until you achieve the aged look you desire.

I decided to add some aged stamps, using the technique I showcased on Monday.

Make sure everything is heat set.

For the metal plate, I used a scrap of paper, could be card stock or watercolor paper, and adhered foil, wrapping a bit around the back so it was all covered.

Place into metal patterned embossing folder and run through die cut machine.

The foil really gives it that metal look (well, foil is metal after all), but this is a distressed card, so out came the rusting paste. I love the old look this product gives and to top it off, I used a blue patina for a corroded look.

I finished off my card by stamping one of the cars and the "You. Are. Old." sentiment from Consider Yourself Vintage set.
I'll see you tomorrow, don't forget to comment to be in the running for one of two grab bags of Unity stamps!
Tuesday, February 14, 2017
Growing In Unity Day 2
Welcome back to day 2 of my week as a GIU gal. Today I am going to share one of my go to background techniques. It's kind of similar to the technique I shared yesterday, only you use a stencil with the distress ink, instead of a stamp. I learned it from the Tim Holtz blog and use it often.


Gather supplies. I used Whooty and the sentiment from Harrison Hedgehog.

I didn't want my background to be stark white, so I began by inking my entire piece of watercolor paper with a light earth tone color.

Then I began layering the various inks, lightest to darkest onto my stencil. I use the lightest color all over and purposefully places the rest of the colors, using the darkest as an accent.

Get out your handy dandy spritzer and lightly mist. Too much water will wash away ink or make it all pool tougher, giving it a muddy look and you'll lose the definition of the stencil, so go lightly.

Place on top of paper. You're basically stamping the paper with the inked up stencil.

Press down with a clean paper towel. This mops up extra ink that pushes through the holes in the stencil.

Seal in the colors by setting with a heat tool.

I stamped the owl twice as I wanted to add some fiber under him, but over the branch. I'll cut out the colored owl.

I cut out the colored owl and popped him up in place on my colored background rectangle. I added a couple of burlap end threads under his claws.

The finished card! I love the cool effect this background gives.
Be sure to comment each day for a chance to win one of two grab bags of Unity Stamps. See you tomorrow!
Monday, February 13, 2017
Growing In Unity Day 1
I'm pretty excited about being a GIU (Growing In Unity) gal this week. I found Unity Stamp Co a little over a year ago and I'll never leave. I love the stamps, both for the images and the quality. I'm often asked, "How did you make that?", so I thought I'd use my week to post some photo tutorials of my favorite techniques. I have one stamping technique and 4 background techniques. Today I'll tackle the stamping one.
This process really does create the most stunning result and is so fast and easy. There are some sets that create gorgeous results with this technique, and Bohemian Backgrounds is one of my favorites.


I start by inking my stamp with the lightest color of ink. Then, taking the next darkest color, ink random sections of the stamp. Finally, using the darkest color, ink a few spots on the stamp as you don't want the image to be overpowered by this color.


This process really does create the most stunning result and is so fast and easy. There are some sets that create gorgeous results with this technique, and Bohemian Backgrounds is one of my favorites.

To begin, gather all of your supplies. I usually choose three colors of distress ink, at least one of the colors the opposite temperature of the other colors; I think it adds interest. Too many colors and you'll be left with a muddy image. I use watercolor paper that I get at the big box craft store, nothing special. Be sure to have a water spray bottle handy.


Next, spritz with a fine mist of water. This gives the stamped image that watery look. You don't want to be too heavy handed with the water or you'll wash off the ink or make it puddle, blurring the lines of the stamp. Stamp on your paper in the normal way.

Zap with a heat tool to set the inks before they run.

You're left with a really cool looking watercolor look.

I stamped a partial image at each end and used my Misti to add a sentiment, from Thanks Above & Beyond, under the main bloom.

The finished card. I also like this process with Feather Soft Love.

Be sure to leave comments each day to be in the running for 2 randomly drawn winners for a grab bag of Unity stamps!
Subscribe to:
Posts (Atom)