Welcome
Happy March! This month is all about the masculine projects. People often tell of how they struggle with masculine cards, so I thought I'd give some pointers. I love getting grungy, messy, inky, and distressed, and this helps create wonderful masculine work.
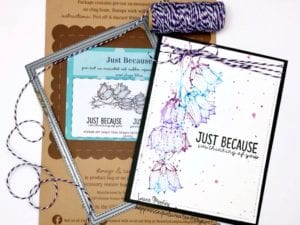
The Project (#1)
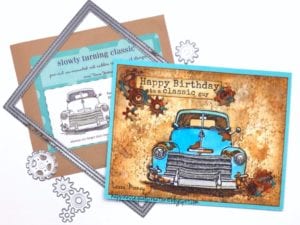
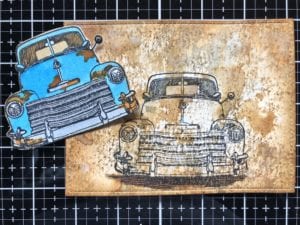
You get a two for one this week as I will showcase two different techniques. Firstly, I show how I make a distressed card. I simply adore using this fabulous truck,
Slowly Turning Classic, for my guy cards. There are many car enthusiasts in my world, how about yours?
The Steps
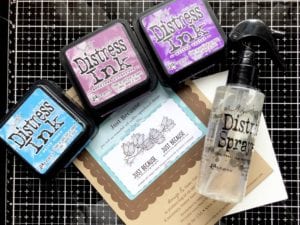
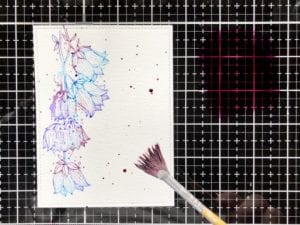
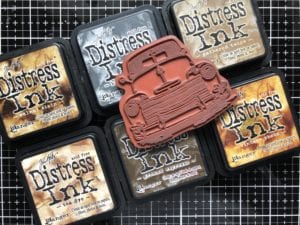
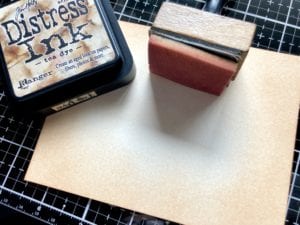
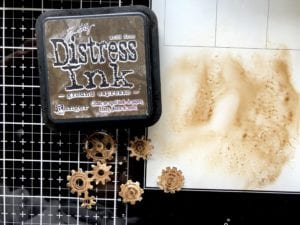
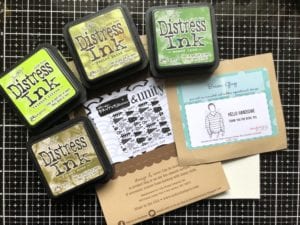
The background was created using a variety of Distress Ink colors.
Sponge the lightest color over the entire background, working from the outer edges in toward the center, for this gives a cool vignette look.
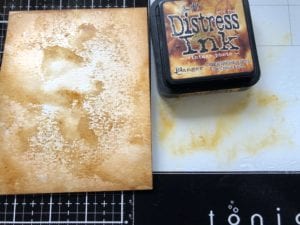
Use a darker color around the edges to emphasize the vignette. Spritz with water, dabbing up the drops, to leave the aged and worn look.
Further aging can be achieved by smooshing (or pressing) your paper into ink that has been pooled on your mat. Be sure to make you dry your project in between steps or you'll just end up with one puddle, instead of distinct areas of color. Continue adding ink until you are happy with the result.
With the darker colors, don't add as much water so that you are left with smaller spots of "aging". Continue adding ink, both with full water smooshing, dry smooshing, and sponging, until you are happy with your background.
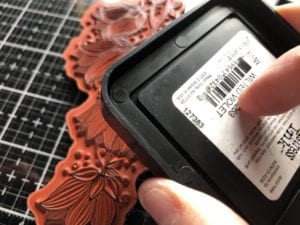
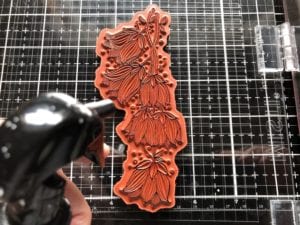
When you are happy with the results, stamp the image onto the background, to capture shadows and such. Stamp the image again, onto a second piece of paper and color with your desired media. Cut out and glue down onto the background, matching up the stamped images.
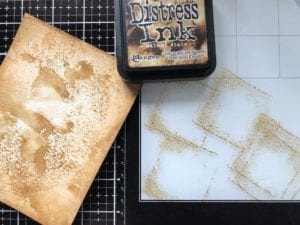
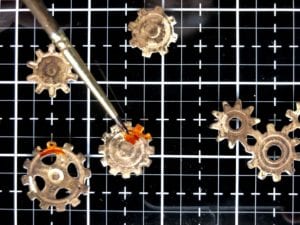
I decided to add some distressed paper gears. Dip them into wet Distress Ink to gain that base color.
Add rust colored ink. I like the pop of color this step gives and it matches the rusty spots on my truck.
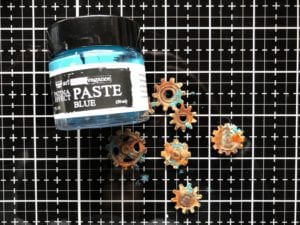
To give them a further corroded look, and to pull out the blue of my truck, I added a blue patina to the gears. Lastly, I stamped a sentiment banner and tucked it in amongst the gears. And there you have a fabulous card that any guy would love.
The Project (#2)
A super distressed look, though cool, takes a bit of time to achieve, so I have brought you a second, pretty quick card.
The Steps
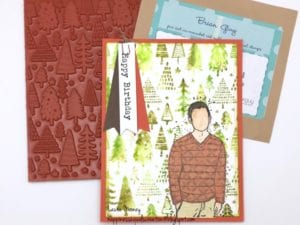
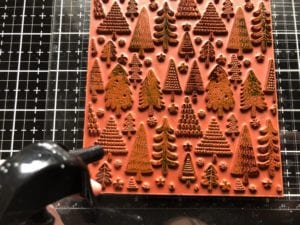
For the background, I used a variety of green distress inks, and the
Brutus Monroe Freshly Cutstamp. Patterned paper also works, but I love the trees along with the Angie Guys. This is
Brian Guy, one of the growing number of Angie Guys.
To make my background, I inked it with greens, spritzed with water, and then stamped.
Brian Guy was dressed up in some snazzy paper, using the paper piecing technique. I channeled Lisa Arana and used her fabulous sentiment banner, attached with a paperclip. It's such a great idea and works well for a guy card.
I hope you have found some inspiration for the next time you need a masculine card!
The Challenge
The challenge: make a masculine card or other project. Post in the
Unity Show & Tell group on Facebook to be in the running for deeply etched red rubber of your very own. This challenge will be open all month.
Be sure to tune in next week for another Quick Card, happy stamping!