Sunday, June 30, 2019

Purrfect Right Meow Light Up Card

I love making interactive cards and Unity's new Interactive Verbiage kit is perfect for adding the action words to your cards, giving directions to the recipient. I'm super excited to use this kit for all of my interactive cards! I made sure there were lots of action words for all of your interactive cards.


See how I assembled this card to light up the kitty's heart.


Interactive Verbiage

Purr-fect Right Meow


Thanks for tuning in. Until next time, happy crafting!


Friday, June 28, 2019

Lawn Fawn Galaxy Kitty Card

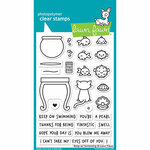
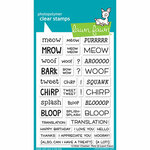
I recently picked up Lawn Fawn's Keep On Swimming. The kitty that is in the set is so cute. He's supposed to be looking up at the fish in the bowl, but I thought it would be fun to have him looking up at the night sky. I thought using some of the sentiments from Critter Chats would be super fun. I love the translations.

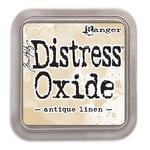
1. Build galaxy sky by blending bright spot onto watercolor paper with Distress Oxide inks
2. Build up the night sky using Blueprint Sketch and Black Soot Oxide inks.
3. Spritz with water and flick white paint for stars
4. Die cut with decorative border die
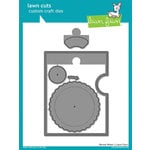
5. Die cut hill with hill die, then die cut the bottom portion with first border die
6. Color and cut out kitty; glue down on hill
7. Emboss sentiments with white on black cardstock; adhere to card


Until next time, happy crafting!

Affiliate Links:


Tuesday, June 18, 2019

Reveal Wheel Fish Bowl

The release of Lawn Fawn's reveal wheel took the card making community by storm. It's so fun to spin the wheel and see a story reveal itself. The best thing about the Reveal Wheel? The designed it to have add ons! One of the most recent additions is this darling set with a fish bowl, two kinds of fish, a pearl, table, and curious kitty.


My favorite is the puffer fish. I think his lil face it just so cute. I adore his "trying hard to puff out" look. As you spin the wheel, he goes from regular fish, exerting fish, puffed out fish. The sentiments that are included in the set are so cute and I love the font.

I created a little homey space for my bowl to live in and a house is not a home without a cat, so of course I added the curious kitty too.

Thanks for visiting, here are the affiliate links for the supplies:


Until next time, happy crafting!

Saturday, June 15, 2019

Graciellie Design Hey Friend

It's finally sunny here in the PNW and I pulled out all of my light, airy, soft papers to make a card with this fun digi stamp kit from Graciellie Design, Hey Friend. I decided to just use the leaf and flower, sizing one of the leaves smaller.

1. Open digi file.  Crop and configure onto page. Print
2. Color in images. I used watercolor pens
3. Afix to base
4. Die cut lace. I tinted the smaller lace pink
5. Glue to base
6. Tie twine around top of base, over lace
7. Pop up sentiment over the hanging leaves and feathers.


Friday, June 14, 2019

Celebrate In Style

I love me a quick card! This stamp kit is one of my quick card go to kits. The image is so pretty that you don't need a lot of fuss added to it in order to get an elegant card. And as an added bonus, this kit is on sale at the Unity Stamp Co site all weekend long! Be sure to pick it up for your quick card needs.

1. Stamp out on decorative edge die cut card
2. Color in bits (or the whole) of the flowers and leaves
3. Matte to a dry embossed piece of cardstock
4. Stamp out sentiment and turn into banner, adhering to top with foam tape
5. Sprinkle some gems for added elegance


Best of the Best

Until next time, happy crafting!


Thursday, June 13, 2019

Wildflower Shaker Card

What better way to celebrate friendship than sending that special someone a handmade card? How about a handmade card that is an interactive shaker card? Or even better, an interactive shaker card that has wildflower seeds in it for them to plant. Your friendship will be there to celebrate year after year.

1. Die cut a seed packet on Silhouette Cameo. 
2. Stamp the seed packet image.
3. Cut out the center of the image.
4. Watercolor stamped flowers on inside of packet
5. Stamped background onto packet borders, after masking off seed packet stamped image.
6. Adhere acetate to the inside.
7. Used good double sided tape to close up the packet.
8. Fill with seeds.
9. Close the back flap and added washi tape so that it's easy to open.


Everblooming
Everblooming (affiliate link)
Insightful Meadows
Insightful Meadows (affiliate link)

Vintage Burlap
Vintage Burlap (affiliate link)


Good news! The Everblooming kit is on sale this weekend over at Unity Stamp Co site. Come take a look at what's on sale and pick up your favorites.

Monday, June 10, 2019

Capture

I have to tell you that I just love love love this camera digi stamp kit, Embrace The Moment from Graciellie Design.

I opened the frame in Photoshop, slightly tinted it to make it vintage looking, brought in my photo as a second layer and added it under the frame. Since the frame is a PNG, with an open center, the photo pops up inside the frame. I added them to an 8.5" x 11" page and printed them off onto photo paper. I cut them out and added to a mixed media background. I printed off the "Capture The Good Times" sentiment after enlarging it. I also printed off the camera, watercolored and added it as an embellishment. Then I added the clouds, hearts, anchor, and journaling.

I love how it turned out. I will be using these little frames again! How can you think outside the box? Be sure to visit the shop and find the perfect stamp kit or digi paper pack now.


Affiliate Links (thanks for you support!)


Until next time, happy crafting!


Sunday, June 9, 2019

Kitten At Play (with video)

I've been making these Kitten At Play cards, using Unity Stamp Co's Kitten Encouragement, for a while, but I wanted to do a video showing how to use the wobblers. Also used is Let Your Wishes Fly. Wobblers can be found here. I hope you find it helpful so you can make these fun, interactive cards too.


Here is a video showing just how it's put together. Thanks for watching!


Until next time, happy crafting!


Saturday, June 8, 2019

Relax: A Flair For Buttons Layout

Hello, I am here with you today to bring you an A Flair For Buttons layout. It's beginning to look a lot like summer here. We bought a hammock last year and it is the perfect place to relax. Right now it's up high enough that I have to use a chair to get into it, but that allowed the cat to climb in and join me!


I used the I Love Arrows Flair. I love the bright colors that were perfect with this Vicki Boutin collection. Be sure to stop by the shop and find the perfect flair to help tell your story! Until next time, happy crafting.

image 0

Affiliate Links (thanks for your support!)


Friday, June 7, 2019

GIU Day Five - Design Principles

*sniff* here we are, my last day as the GIU gal. I'm also wrapping up my design principle series. There are plenty more, but I only had five days, so you I brought you the ones I think about most when in my creative space; whether it be creating cards, layouts, or a crafting a photo.

Today I am going to tackle flow. Flow simply means the way that your eye travels through an art piece. Now here in the Western World, we are trained to read from left to right, top to bottom. It's how our printed materials are laid out, so it's how we view art. There are a number of ways to help your view move through your artwork, but I'll look at two.

Left to right, top to bottom:

Like I said above, this is how we read, so this is the first way our eyes are going to think to move. Another way to think about this is our eyes are moving at a diagonal. Diagonal lines are something I always look for in a photo composition because I find it much more interesting than a straight line across and it causes your viewer to linger longer. I hope you can see this theme that runs through the whole week. You've invested time and heart energy into what you create and you want people to linger and enjoy, not just sweep through and be on to the next thing. To move simply from left to right or right to left, in the center, does just that. The eye just sweeps through and the brain moves on. By creating this diagonal line, you're inviting the view to take their time and enjoy.


Z line:

Creating a Z through your work, you're inviting your viewer to linger even longer, but still having order in your piece. An example of this is to begin at the top left, move to top right, swoop down to the bottom left and then end up at the bottom right. You see how much longer it takes to move through, using a Z line? My Z starts with the clouds on the left, moves to the cloud on the right, picks up at the bird and flower, follows down the mouse, and finishes along the grass.


I hope you have enjoyed this peek into what goes through my brain as I work and maybe even find it useful when you create too. It's been nice really thinking about why I do what I do and researching the why. Our brains are so cool and I love learning more all the time.

Be sure to comment for your chance at some deeply etched red rubber of your very own. And while you're at it, subscribe to this blog so you can keep up with what is going on in my craft room. Thanks for joining me, I've really enjoyed being with you!

Until next time, happy stamping.