Showing posts with label Tutorial. Show all posts

Friday, January 31, 2020

Unity GIU, Day Five: 1 Stamp, 5 Projects: Art Journal

And so it has come, my last day as your GIU gal for Unity Stamp Co. It's been a great week and I hope I have shown you that your stamps can be used for more than just card making. 

To finish off my week I have decided to get whimsical and colorful spread for my art journal. An art journal is a fabulous place to play around, try out new techniques, and just create for the fun of it. I decided to go all rainbow. I saw a cute meme on Facebook the other day and it inspired this page. The Cuddlebug Zebra is the star, with a guest appearance by the cloud from Sending Up Something Beautiful Be sure to see how it was made by viewing the video below.


Cuddlebug Zebra

Sending Up Something Beautiful

Thanks for joining me this week. I hope I was able to show you how to stretch your stamp stash to use in a variety of project formats. Be sure to leave comments on all the days so that you have a better chance at winning one of the prizes! Until next time, happy stamping!


Wednesday, January 29, 2020

Unity GIU Day Three: 1 Stamp, 5 Projects: Canvas

Welcome back to day three of my GIU week. I'm exploring different ways to use our stamps by showing a variety of projects.

Today the cute lil zebra will be starring in a canvas. I have a little display of wooden animals that I bought back from Africa and this canvas fits right in. The sunsets there are seriously amazing. I think it's all the dust in the air, so I made my background to reflect the amazing sunset. Yes, my burlap is back, this time as a stand in for grass. Be sure to watch the video to see how this came together.


Cuddlebug Zebra


Be sure to tune in tomorrow for my next project, showing you how to stretch your stamps in so many ways. Be sure to leave a comment each day so you can have a chance to win one of the prizes! Until tomorrow, happy stamping!


Tuesday, January 28, 2020

Unity GIU Day Two: 1 Stamp, 5 Projects: Layout

Welcome back to day two of my GIU week. Hopefully you tuned in to yesterday's post. If not, go ahead and take a look. I introduced my intention to use one stamp kit and show how versatile it can be by using it on five different types of projects. Today I'm taking a look at how to use stamps in scrapbooking.


For this project, I made an embellishment spot to add to my layout of zebra seen on my recent trip to Tanzania, Africa. Pundamilia is the Swahili name for zebra. I really enjoyed the zebra sightings. They are super smart, friendly, family oriented, and just fun to watch. I love their stripes. The coolest zebra encounter I had was seeing a very pregnant female, close up. She was so close that we could see the baby moving inside her! 

I stamped the Cuddlebug Zebra out onto a circle spot, colored the grasses the color of the dry season and added it onto my layout. Simple and easy way to stretch your stamps for different formats of paper crafting. You can see how this came together in the video posted below.


Cuddlebug Zebra

Brian Guy

Meant for Adventure


Be sure to leave a comment on each post this week to be in the running for a prize of your very own deeply etched red rubber! You don't want to miss out. And be sure to visit the Unity site to check out what's new and what's on sale. I'll see you tomorrow with another type of crafting project using our favorite cuddly zebra. Until tomorrow, happy stamping!


Monday, January 27, 2020

Unity GIU Day One: 1 Stamp, 5 Projects: Card

Hello, fellow Unies! Welcome to my GIU week 2020. This week I thought I would look at different types of projects to use our stamps on. And for an added bonus, I am using just one kit all week, with a few supporting kits here and there.


The star of this week is the adorable Cuddlebug Zebra. Isn't he just the cutest? I got to go on safari in Tanzania, Africa last year and I came to love the zebra. All the cats were so cool and I got to see a lot of them, but the zebra are everywhere and they are so smart and seem very caring within their herds and look really cool against the golden grasses, a look that I tried to convey in my card with the color palette and burlap texture. Be sure to check out the video of how it was put together below.

Cuddlebug Zebra


Be sure to leave a comment to be in the running for a prize of some deeply etched red rubber of your very own. Tune in tomorrow to see this lil guy in action on a project of a different kind. Until then, happy stamping!

Thursday, December 12, 2019

Creating A Scene

Happy Thursday and welcome to the blog. How are you all getting on with your Christmas shopping? May I suggest a Unity Stamp Co gift card for that stamper in your life? I know it would be greatly appreciated.

Unity has so many great background stamps and a few scene stamps. I love building a scene for my main subject, so I pulled a couple out to create a scene for an Angie Girl and Angie Guy. Make It Happen Girl and Brian Guy are the stars of this week's cards. I paired Make It Happen Girl with Cafe Delights and Brian Guy is hanging out in A Walk In The Woods. Be sure to watch how they were made in the video below.


Cafe Delights

Make It Happen, Girl
A Walk in the Woods

Brian Guy


Use one of the many background or scene stamps to create a place for your subject to hang out in. No background stamp? No problem. Build your own using as many kits as you like. You have a week to upload into the album in the Show & Tell group, in order to be eligible for a prize. Until next time, happy stamping!

Saturday, December 7, 2019

Stamping Gifts

Happy December! It's the season of giving and what better gift to give than one made with your own hands? I love giving and receiving handmade gifts. I like to think about my recipient as a create a little something special just for them. If you also love to give your heart in a gift, this is the challenge for you!

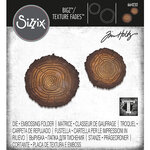
I have been giving handmade ornaments with the Christmas cards, to my co-workers, for years. When I saw the new wood slice die/embossing folder from Tim Holtz, I knew I wanted to make ornaments. As soon as I saw A Little Mousy, I knew I had found my stamp! This is such a cute kit, very versatile, and was a fairly simple project to make. Cut and ink the wood slices, stamp and color the image, cut out and add to the wood slice. You can see the process in the video below.


A Little Mousy


For this challenge, I task you with making a gift of some sort. It can be a pack of cards, canvas, coaster, jewelry, ornament, the sky is the limit! Bless someone's day with a gift from your heart and hands. The challenge will be open all month, so you have time. Be sure to upload to the Unity Show & Tell group to be in the running for a prize. Until next time, happy stamping!

Thursday, November 28, 2019

Unity Stamp Co Challenge - Thankfulness and Gratitude

Welcome!For all of my American friends, Happy Thanksgiving! All of us should remember to have an attitude of thankfulness and to be truly grateful for what we have and for those in our lives.

A friend asked if I would make him a card to give to his wife, to let her know how much he appreciated her and her support during a rough season. What better way to let someone know how much they mean to you than to send a handmade card? This is one of the ways we can use our craft for good.

I made this pretty floral card, using Don't Give Up, that is loosely watercolored. It's a pretty quick way to whip out a fast card. I love this sentiment kit. Not only a gorgeous image, but really thoughtful sentiments to accompany it.

Don't Give Up {april 2019 sentiment kit}


I challenge you to make a card to send to someone showing your gratitude. It's a tangible way to tap into the thankfulness in your heart. This challenge will be open for one week, until December 4th. Be sure to upload your project to the Unity Show & Tell groupto be in the running for a prize. Next week I will have a new month long challenge, so be sure to tune in then! Until then, happy stamping!

Thursday, November 21, 2019

Single Layer Card - Unity Challenge

Happy Thursday! I'm up on the Unity blog today. We are entering the Winter and holiday seasons and I have a cool card for you today.


Today I'll show you how to make a single layer card, with a masked stamp image. I used the new Tierra Jackson snowman found in Stay Warm. He's such a cute snowman and the lil bird just kills me. Be sure to watch the video below to see how I used masking to make my inky background, whist leaving the stamped image clean and ready for coloring.


Stay Warm


Create a single layer card, bonus points if you incorporate masking in the making of, but not required. Be sure to upload to the Unity Stamp Co Show & Tell FB page. There will be prizes given! This challenge will be open for one week, until 11.28.19. Until next week, happy stamping!

Thursday, November 7, 2019

Unity Challenge - Black & White

Hi and welcome to another Unity Stamp Co mini challenge! I have a simple card and some thoughts on the rule of odds for you today.


Today I am sharing a simple card using just black and white. White paper and black ink. There are plenty of great images you can use that don't need any added color. For this project, I used Damn Girl and a sentiment from Not Always...But. I love the lacy background! My gems were placed using the rule of odds. The brain loves to have things arranged in odd numbers. Even numbered things confuse our brains. I'm not sure why, but this is a classic interior designer rule in arranging photos, vases, other decor, and it works for adding embellishments to our art pieces too. Check out the tutorial here.


Damn Girl

Not Always...But


Make a black and white creation. Put your colors away and use the textures found in your black and white supplies. Be sure to upload to the Unity Show & Tell FB pagefor the chance at winning a prize! Try to keep the rule of odds in mind too, I think you will find it helpful.

Until next time, happy stamping!

Sunday, June 30, 2019

Purrfect Right Meow Light Up Card

I love making interactive cards and Unity's new Interactive Verbiage kit is perfect for adding the action words to your cards, giving directions to the recipient. I'm super excited to use this kit for all of my interactive cards! I made sure there were lots of action words for all of your interactive cards.


See how I assembled this card to light up the kitty's heart.


Interactive Verbiage

Purr-fect Right Meow


Thanks for tuning in. Until next time, happy crafting!


Sunday, October 8, 2017

Shrink Plastic Pendant


I got this amazing dragonfly stamp from Unity Stamp Co. It's huge. I love the details in the wings and thought it would make some amazing jewelry. I got out some shrink plastic and got to work.

I am including affiliate links for my supplies. It helps you find the products and helps me to bring you more tutorials, thanks.


I got out my Misti, as this really helps if you need more than one stamping pass and to make the best use of the space on the sheets. I stamped it on the rough side with Versafine ink. I first tried Momento, but it smeared when I touched it and I was able to completely wash it off and start over. I found the Versafine to work best.


I pulled out my colored pencils and set to coloring. I tried to use a mix of warm/cold, bright/dark. I love the way the creaminess of the Prismacolor went down.


Since I was making pendants, I punched a hole for the jump ring. Remember, it will shrink so don't use your tiny punch. This one is the Fiskers 1/4". The 1/8" was too small and just filled itself in (you can learn from my mistakes!


Place on a foil lined baking sheet (I have a mini bar pan that I used) and bake in a pre-heated 350 degree oven. This batch of dragonfly curled up and the wings stuck together. I pulled them out, turned them over, and placed back into the oven. Once soft again, I was able to detach the stuck wings and flatten out. 


All finished and you can see how much they shrunk! I attached a jump ring and did a bit of wire twisting to add some beads, then placed on cording with closures added. You could simply attach a ring and slide it on to a chain you already have.


Friday, September 29, 2017

How To Create A Grungy, Rusty Background

I love all things rusty and corroded. There is just such history there. Thankfully you can speed up the age of time with some great mixed media products. I have provided links to some of the things I have used and by clicking on them, I do get a small commission, but that helps me to bring you new ideas and how-to posts!


Watercolor paper is pretty important here because we are going to get things wet, multiple times, so a good, sturdy base is a must. Plain card stock just will not hold up very well. I began by adding Distress Ink colors Wild Honey, Rusty Hinge, Vintage Photo and Ground Espresso, working from lightest to darkest as I moved out from the center.


Next, spritz it with a spray bottle. I really love the spray drops that the Tim Holtz Sprayer makes. From a fine mist to larger drops. This step really starts adding that time worn feel to your background.


Dry thoroughly with a heat tool to set the colors and keep them from running together to make ink mud and get ready for some smooshing!


Now comes the really fun part! I used a variety of Distress Oxide inks to really add that aged look. For this project I used Fossilized Amber, Wild Honey, Vintage Photo, Walnut Stain, and Black Soot, again using the lighter colors mostly in the middle and keeping the darker colors out to the edges. To smoosh the ink, stamp the pad on a silicone mat, spritz with water, dab a plastic baggie or sheet into the ink, smoosh onto background.


I dried with my heat tool, then added drops with the spray bottle, gives it a nice soft, worn look, plus adds fun oxidized areas.

To add an even more aged look, I used the Finnabair Rusting Paste. There are two sets. This basic set and the corrosion set.


I stamped this Angie's Guy stamp, from Unity Stamp Co, and used my watercolors to paint him in. I then used Gathered Twigs to ink the edges and finally added more of the rusting paste, to age the paper.


Next I added the rusting effect to some metal gears I have stashed away.


A bit of burlap and a sentiment, from the Angie's Guy kit finished off my card. I am all ready for a dude's birthday! 

You can use these same techniques to make other projects that aren't old and grungy looking. I made a set of wall decor using the same techniques, but with bright colors.