Wednesday, October 18, 2017

Wanna '17

Every July a group of scrapping friends gets together to hang out for a long weekend to get our scrap on and hit Craft Warehouse. There is lots of laughter, creating, and shenanigans. 

To make this CSI case layout, I used a Gelli print, made with my Gelli plate as the background, layering lots of paint with my brayer and through a stencil. Then I added a few pieces of patterned paper to act as an anchor for my photo group. I hung a banner of stars, using Unity's Happy Holidays, strung with a bit of twine. I stamped out, then fussy cut some flowers, using Unity's No Words Bloom. I added small gems to the center to give some added texture. I finished it off by sprinkling some wooden hearts and enamel dots.

Evidence used: polka dots, something hanging, enamel dots, hearts, sprinkle something.

Testimony is documenting the celebration of friends.


Affiliate links to products used:

Sunday, October 8, 2017

Shrink Plastic Pendant


I got this amazing dragonfly stamp from Unity Stamp Co. It's huge. I love the details in the wings and thought it would make some amazing jewelry. I got out some shrink plastic and got to work.

I am including affiliate links for my supplies. It helps you find the products and helps me to bring you more tutorials, thanks.


I got out my Misti, as this really helps if you need more than one stamping pass and to make the best use of the space on the sheets. I stamped it on the rough side with Versafine ink. I first tried Momento, but it smeared when I touched it and I was able to completely wash it off and start over. I found the Versafine to work best.


I pulled out my colored pencils and set to coloring. I tried to use a mix of warm/cold, bright/dark. I love the way the creaminess of the Prismacolor went down.


Since I was making pendants, I punched a hole for the jump ring. Remember, it will shrink so don't use your tiny punch. This one is the Fiskers 1/4". The 1/8" was too small and just filled itself in (you can learn from my mistakes!


Place on a foil lined baking sheet (I have a mini bar pan that I used) and bake in a pre-heated 350 degree oven. This batch of dragonfly curled up and the wings stuck together. I pulled them out, turned them over, and placed back into the oven. Once soft again, I was able to detach the stuck wings and flatten out. 


All finished and you can see how much they shrunk! I attached a jump ring and did a bit of wire twisting to add some beads, then placed on cording with closures added. You could simply attach a ring and slide it on to a chain you already have.


Tuesday, October 3, 2017

Starry Night With The Tardis

I participated in a fun gift exchange with a group made up of various fantoms. My person is a Doctor Who fan, as am I, so I decided to step out of my comfy box of painting stamped images and start with a blank canvas and some paints. Yikes! I've not done a painting on my own before! I put this project off for a couple of months, then I really needed to get going on it.


I used heavy acrylic paints made by Liquitex to really get that dimensional look going.


Finally I found a printable Tardis online, but cut off the back and scored about halfway down the sides, so that it was thinner. I added gems on the light for added oomph. All in all, I am pretty pleased with it and the recipient loved it! Yay!


Friday, September 29, 2017

How To Create A Grungy, Rusty Background

I love all things rusty and corroded. There is just such history there. Thankfully you can speed up the age of time with some great mixed media products. I have provided links to some of the things I have used and by clicking on them, I do get a small commission, but that helps me to bring you new ideas and how-to posts!


Watercolor paper is pretty important here because we are going to get things wet, multiple times, so a good, sturdy base is a must. Plain card stock just will not hold up very well. I began by adding Distress Ink colors Wild Honey, Rusty Hinge, Vintage Photo and Ground Espresso, working from lightest to darkest as I moved out from the center.


Next, spritz it with a spray bottle. I really love the spray drops that the Tim Holtz Sprayer makes. From a fine mist to larger drops. This step really starts adding that time worn feel to your background.


Dry thoroughly with a heat tool to set the colors and keep them from running together to make ink mud and get ready for some smooshing!


Now comes the really fun part! I used a variety of Distress Oxide inks to really add that aged look. For this project I used Fossilized Amber, Wild Honey, Vintage Photo, Walnut Stain, and Black Soot, again using the lighter colors mostly in the middle and keeping the darker colors out to the edges. To smoosh the ink, stamp the pad on a silicone mat, spritz with water, dab a plastic baggie or sheet into the ink, smoosh onto background.


I dried with my heat tool, then added drops with the spray bottle, gives it a nice soft, worn look, plus adds fun oxidized areas.

To add an even more aged look, I used the Finnabair Rusting Paste. There are two sets. This basic set and the corrosion set.


I stamped this Angie's Guy stamp, from Unity Stamp Co, and used my watercolors to paint him in. I then used Gathered Twigs to ink the edges and finally added more of the rusting paste, to age the paper.


Next I added the rusting effect to some metal gears I have stashed away.


A bit of burlap and a sentiment, from the Angie's Guy kit finished off my card. I am all ready for a dude's birthday! 

You can use these same techniques to make other projects that aren't old and grungy looking. I made a set of wall decor using the same techniques, but with bright colors.


Saturday, September 9, 2017

Total Eclipse


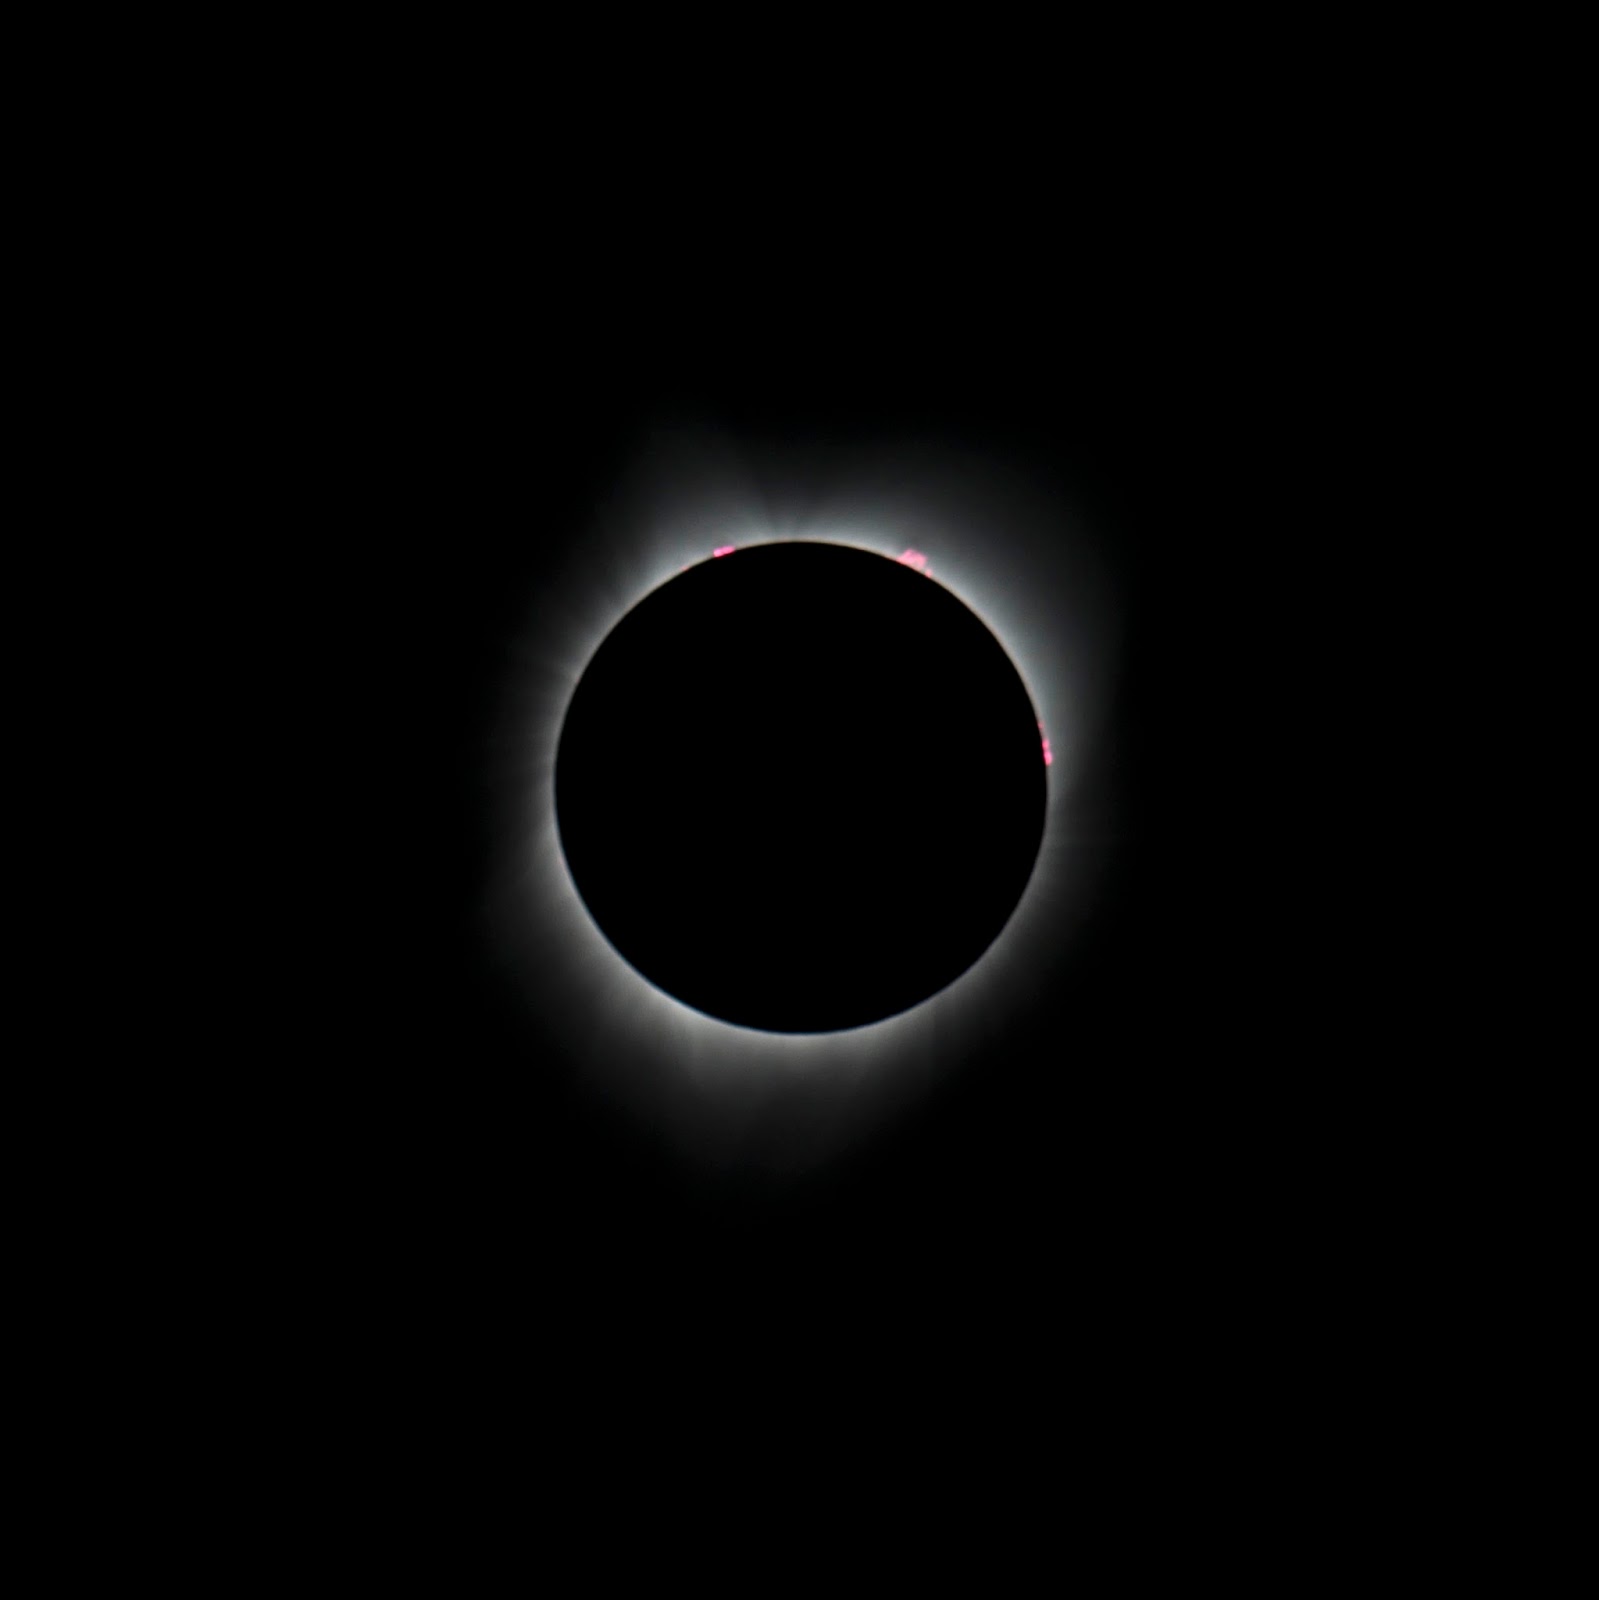
I was lucky enough to be able to experience the eclipse last month in the band of totality, with my mom and step dad. It turned out to be a perfect day. We found (at the last minute) a winery to set up camp near the center of the totality band, up on a hill, with clear skies. We set up at a table they had out for us, complete with special eclipse wine glasses, with eclipse glasses tucked inside. We even got a tasting flight included. We were tucked in at the edge of the vineyard, with it's grapes near ready to pick. We were able to get some fantastic photos of the event. We shot from first shadow until the sun was complete once again. I have to say, the 2 minutes of totality were the fastest two minutes ever and was so much more amazing than I ever dreamed.

I put together a compilation photo of the stages of the eclipse and decided that it would look amazing on a galaxy background. I tossed in some of the different stages to have better views. I've included links to some of the supplies from Scrapbook.com (I am an affiliate member and receive benefits from use of the links) Here are the photos. I think I jumped up and down, squeeing, when I saw those solar flares in the back of my camera!


To make my background I started off with a piece of watercolor paper and gathered my other supplies.


I started applying Distress Oxides randomly around the paper. I used Fossilized Amber, Spiced Marmalade, Wilted Violet, Salty Ocean, and Picked Raspberry


It doesn't need to be all neat and pretty, as most of it will be covered up with the blackness of space.

Next, I gave it a good spritz with the Tim Holtz spray bottle. I like that you can get a very fine mist as well as larger spatters with this bottle.


It makes for some really cool texture!


Then I began the task of covering most of the color up with Black Soot Distress Ink. We want it to look like space with bits of galaxy and nebulas peeking out, so don't worry about covering too much up.


I then went back over with some of the Black Soot Oxide. I found it to be nice and dense and really added to my spacey look.


Spritz again to activate the water reactive properties of the inks, giving cool spaces and textures.


The last step is to add the stars by splattering white spray ink or watered down white paint all over. This last step is what really takes the piece from looking like a mess to really cool. I used Dylusions White Linen spray


I added my photos, some Tim Holtz ephemera, flair from A Flair For Buttons, wooden stars, and a Silhouette die cut eclipse embellishment.


There you have it, a cool galaxy layout for a seriously cool moment in my life. 

Did you get to experience the eclipse? Be sure to document this momentous occasion!